Thursday, May 16, 2013
The Importance of Blogging
In this day and age social media is heavily involved in most
people’s day to day lives. This fact has become an important tool for
businesses of all kinds, including photographers.
Retouching with Graphics Tablets
As today’s technology expands, more and more recourses
become available to photographers, graphics designers, and many others in
similar fields. One interesting piece of new technology is the graphics tablet.
This is suddenly becoming very popular among photographers as a tool for
editing images, however it was originally designed for graphic designers. One
particular model of graphics tablet that seems to be attracting a lot of
attention is Wacom’s ‘Bamboo’ line. These can be purchased at most electronic
stores, as well as online for as little as around $100; the more advanced
models reaching the $300-$400 mark.

So why have these tablets become so popular amongst
photographers as well as the other creative industries that it was originally
designed for?
That seems pretty obvious. Simply plug the tablet into your
computer or laptop, and use the stylus to essentially draw on your images in
whatever program you may use. This tool allows you to be more precise, and to
edit faster than you could dream of doing with a mouse.
Here is an example of what may be much more easily achieved,
using a tablet and stylus;


The options for how the stylus works with the tablet are
also fully customisable, allowing the user to personalise the way they use it
to what suits them best.

As with any new technology, there are cons to go along with
the amazing pros included. Searching through various blogs, vlogs, webpages,
and etc, the only con I have found is the learning curve. This differs from
person to person; some say it doesn’t take long, some saying they found it very
difficult to perfect after using a mouse for so long.
Overall the reviews, forums, vlogs and blogs say predominantly
excellent things about working with tablets, recommending everyone to try it,
and ensuring post production will improve
I will certainly be investing in one and trying it out for
myself!
Sony's new Dog Harness
That's right...a camera harness...for a
dog.
Sony recently launched the AKA-DM1 In
Japan at around $53, the mount is
compatible with Sony's HDR-AS15 rugged
video camera. Weighing in at around
128grams, Sony says that the design
won't wear dogs down.

The purpose behind the strap is to
allow owners to mount the camera and record the world
from their pets point of view. Quite
honestly If I were to mount this onto my puppy
I'd have 12 hour footage of my dog
chasing anything that wonders into the garden combined
with a few mandatory hours of nap time.
Although in saying that the Camera's included Wi-Fi
capabilities allow for cable-free video
transfers, So if I had nothing better to do I could watch live
streaming to make sure she wasn't up to no good.

Various youtubers seem to have beaten
Sony to the punch-line though by strapping their GoPro
cameras to their pets for some time
now. Including this one shot by a Great Dane at the park.
On that note, speaking of GoPro videos, check out this beauty:
Wednesday, May 15, 2013
Lara Jade
I first discovered Lara Jade through her Facebook page in 2011. Even though I wasn't established in my photography yet, and had no idea what field of photography I wanted to pursue, I instantly fell in love with her work. She inspired me because she started out so young, and helped me believe that I could make it in the competitive photography industry, no matter what direction I took.
Lara Jade grew up in West Midlands, England. While living
there she took an interest in photography. At the young age of thirteen she
picked up her father’s camcorder and began taking stills with it. Lara started collecting
compact cameras to photograph with. By the age of fifteen she had discovered
fine art and self portraiture, and received her first SLR, a Canon 350d, for
her sixteenth birthday.
At just seventeen years old, Lara started her own business, starting
off with small portraiture clients’, and quickly moving on to larger clients
like book publishers and music labels. Soon after starting her business she
took on fashion, and later moved to London to work with other photographers in
the fashion industry.
Lara is always striving to improve her photographic and
business skills. In September 2005 she began a National Diploma in Photography,
and later, in September 2007, studied Visual Communication at UCE. Even this
far into her business she continues to learn and improve at every opportunity,
to maximize her abilities as a photographer and business woman.
As Lara Jade explains in her website biography; “I am
influenced by past and present style; whenever I shoot I like to create stories
with an underlying sense of narrative, whether this is in my personal work,
commercial campaigns or editorial projects. I am deeply inspired by elements of
influential style, film noir, old masters in painting and photography,
Romanticism and untouched beauty. All of my experiences in life thus far have
been reflected through my imagery, and continue to shape me personally, and as
an artist.”

The above image was posted to the Facebook page; Lara Jade
Photography in April last year (2012). It is a picture from the very beginning of her
journey as a fashion photographer, and as she describes it, it was one of the
first fashion images that she was really proud of. Her pride in this image
helped to push her to follow fashion photography, and influenced her to keep
going.
Throughout her quickly expanding career as a photographer,
Lara Jade has acquired many major clients. These include magazines such as
Elle, Lush, Material Girl and Institute, as well as other clients like Sony
Music, Schwarzkopf, Harper Collins, and Lamb. As well as working with these
well known clients Lara continues to photograph for herself, as well as holding
photography workshops for aspiring fashion photographers all over the world.
She has also written a book, Fashion Photography 101, which was published recently.

As my idol, Lara Jade influences me greatly. I stated at the beginning of this blog that I was interested in starting my own business as a pets/family/couples/newborn/glamour photographer. However now I am rethinking again thanks to Lara Jade and other photographers like her, and considering starting out with glamour and pursuing fashion photography.
Here is a small selection of some of my favourite Lara Jade photographs;


People Today
It's funny to see that people these days are scared and wary
of people and photographers with a big DSLR camera and a long lens. On the
other hand, if you're using a small compact camera then that seems to be fine. This
is especially true since the increase in the amount of selfies which are posted
around the net. This is seen in all the family photos posted across Facebook
and Instagram, so loved ones can see them across the world.
However, when someone else wishes to take their picture all
that goes out the window. When you're out and about in public places snapping
away taking photos you always seem to get that sideway glance of are they
taking photos of me? What are they going to with that photo? Yet out of common courtesy
we as photographers sometimes will ask if they mind having their photo taken
but this is more so that we can get a nicer picture. What a lot of people don't
know is that if you're out in a public place anyone has the right to take your
photo. Now I don't know if this is a good thing or a bad thing but it's just
the way things are. I know a few people and even myself people have come up to
them ask tell them you can't take my photo, why are you taking my photo etc, so
it turned around to one person one day and said do you have Facebook ? Yes, and
do you post photos to Facebook? Yes, so then how is that any different than me
taking your photo? As you are posting for the world to see your photos I'm just
helping you along.
Tuesday, May 14, 2013
Wildlife
Since my passion is Wildlife/Nature
photography I thought I would write about some of the people that inspire me
and that I follow and pass on some of their wisdom too. First of all I would
like to mention Michael Snedic and Mark Rayner the guys behind Trekabout
Photography Workshops.
Michael Snedic is one of Australia's
most accomplished wildlife and nature photographers. He has been photographing
across Australia for the past 16 years. He is also a highly experienced,
professional photography tutor, especially in digital photography. Michael
loves sharing his images and photographic knowledge with the public.

Mark Rayner is a fully accredited
professional photographer (AIPP), an expert in post processing, retouching and
workflow. His specialties lay in Wedding, portrait and commercial photography. He
recently received one of four 'Highly Commended' awards in the '2012 Shoot the
Architect' photography competition from the Australian Institute of Architects.
Together Michael and Mark have formed
the company Trekabout Photography Workshops. Trakabout Photography offers personalised photographic tuition,
in stunning natural locations and at affordable
prices. Brisbane photography workshops are offered by many companies.
Attention to detail and high levels of hands-on individual tuition. I have had
the pleasure to be able to join them on a few of their workshops and it has
been great both Michael and Mark are very welcoming and very happy to share
their knowledge and experience with you.
Below are
the Links to both Michael and Mark websites and their Trekabout Website.

Here are some tips done by Mark Rayner about wildlife
photography
7 Tips to help
improve your Wildlife Photography.
Some of these tips can equally be applied to people (portrait) and your pet photography.
1. Shoot from the eye level of your subject (or slightly lower). The difference is remarkable when compared to just standing and shooting down on your subject. Try the different angles next time you're out in the field and you will see what I mean.
2. Focus on the eye. Make sure you get those eyes in focus or your image will surely fail. It is just that simple. The eyes must be tack sharp and if they are you are halfway to a great shot.
3. Leading on from point 2, use single point focus. If you have your camera set to auto focus point selection you run the risk of the camera picking up the wrong spot and you'll end up with your subject blurred. By using single point focus, you chose the spot that the camera will focus on. Using this method you can then make sure your focus point is lined up on the eye.
4. Blur out your background. Shoot "wide open", i.e. use a large aperture, say, f/2.8 to f/5.6 depending on your lens of course. This will eliminate distractions in the background and allow all of your viewer's attention to be directed to your subject. Nice soft bokeh (background blur) can make or break a good photo. The added advantage to shooting with a wide open aperture is that, automatically, your shutter speed will be faster. Faster shutter speed equals less chance of a blurred image due to movement or camera shake.
5. Choose your background carefully when composing your shot. You can't always do this with moving subjects as you may just have to grab the moment, but if you do have time, study your background. Moving a small distance may mean the difference between having a stick growing out of your subject's head or not. It is easy to get carried away with the excitement of the moment but that small change of position could be the difference between a good shot and an award winner.
6. Get to know your subject. Study the way your subject, be it a King Parrot or a small dragonfly, moves and interacts with its environment. If you understand what makes your subject tick, you can often anticipate what they will do next and be prepared in advance for the shot.
7. Make sure your camera settings are ready for the shoot. Typically you will have aperture, ISO, focus point, exposure compensation, metering, shutter mode (single shot or high speed continuous) all selected and set before you lift your camera to your eye, or even begin approaching your subject. Be prepared and ready to just focus and shoot. The last thing you need is to be quickly changing settings while that Tasmanian Tiger disappears back into the forest. Here is my last shot of a Tasmanian Tiger.

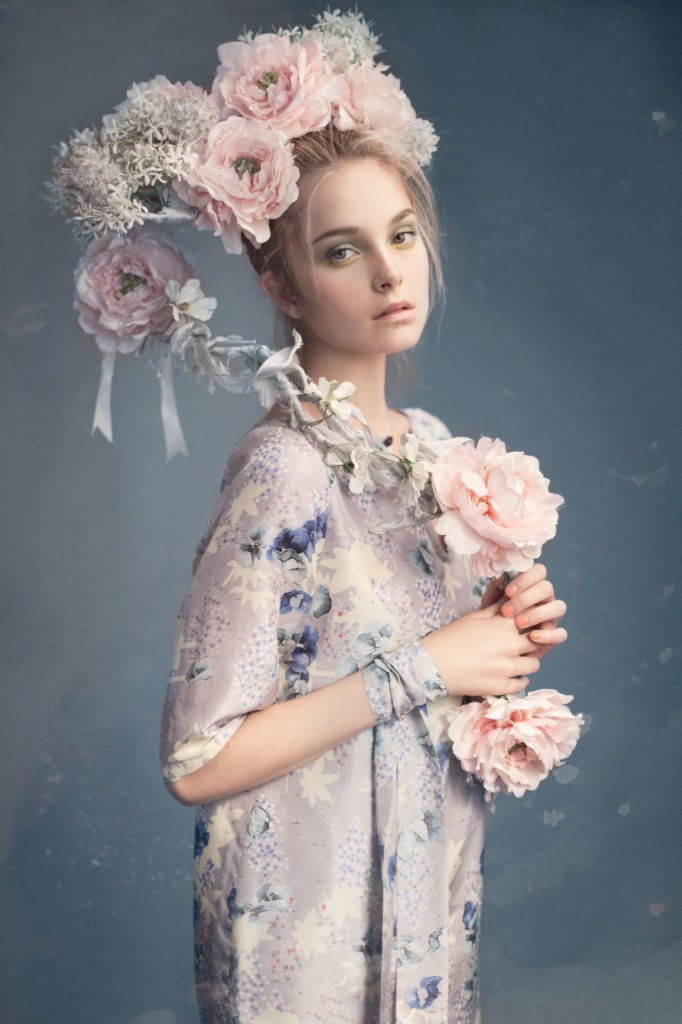
Kirsty Mitchell
-->


I first discovered Kirsty Mitchell and her
amazing Photography around three years ago, when she had as little as 500
followers (recent count 42,968) Her photographs initially caught my eye but
once I read her story I was completely hooked.
Kirsty Mitchell for the past three years
has been working hard on a series she likes to call ‘Wonderland’ at first
glance her images are sensational, bright and honestly they could hold my
attention for hours. The more I look, the more detail I find and I think it’s incredible.
But what really caught my attention and has made her name stick with me, was
the reason behind all of this.

Kirsty Mitchell’s mother Maureen was an
English teacher, who spent her life inspiring generations of children with
imaginative stories and plays, and sadly in 2008 Maureen died from a brain
tumor, and Kirsty channeled her grief into her passion for Photography, and
created ‘Wonderland’ a tribute to her Mother.
It initially all began as a small summer
project but soon blossomed into something MUCH, MUCH bigger.
I soon found her website and began to
follow her journey. The painstaking detail that goes into these images is just
phenomenal, you can read all about the work that goes into each and every
single photograph on her website, Kirsty will even wait up to 12 months to
shoot an image just so that flowers in bloom match the colors of her dresses.

I think that her work is beautiful and so
inspiring, and It’s a relief to finally see her work receiving the recognition
that it so deserves.
If you have a spare few minutes please have
a look at her website, You will not be disappointed.
http://www.kirstymitchellphotography.com

Saturday, May 11, 2013
Easy Release - Model Release App
I found this app at the end of last year, and fell in love with it.
 (Currenly on itunes for $10.49)
It has made the process of getting Model Releases so much easier for me. None of this rushing around, printing copies to cram into my bag, or running around trying to remember where I left them. It completely eliminates having piles and piles of model releases sitting around on my desk. They are all easily accessible and all in the one place.
They can easily be e-mailed or transferred over to my computer (So if I need a copy its as easy as that) and If I misplace one, I can easily find/print it again.
It allows you to save your signature and apply it to every release, so really the only thing you have to change would be the Models name, and signature.
I wish I had found this app much sooner, I think it is most definitely a must have, especially for $10.49 (To put it into perspective, think of all the paper/ink used to print (Re-print) In the long run you are saving with this app not only money but time too)
Thursday, May 9, 2013
Composite Genius - Joel Grimes
By ELLIOT TONKS on May 9th 2013

This will be a short post about my new commercial photographic idol of whom I'm attempting to make a folio to his work. Face it, the guy is a genius.
In my previous post about Elance and finding your niche, I mentioned Joel Grimes as an example for someone who created their niche and has build a massive name for himself and aspiring thriving photographers every day for that definite commercial appeal.
Joel dominates in composite work by merging a photoshop cut out image of a model onto a previously taken HDR (High Dynamic Range) photo. He spends hours injecting his photoshop mastery into each piece of his work and has recently been shooting for Red bull and Porche.
His work can be found at www.joelgrimes.com
A video of the man and his talent http://www.youtube.com/watch?v=_VrVhnIlHZ8
Do you know anyone who shoots like joel?
One site to help you get more clients

Finding work as a photographer is becoming more difficult in our ever so growing economy with a constant rise of competing fellow photographers. Finding your USP (unique selling point) can take years to perfect, whilst finding a market for your niche of work. There are two main options one can take to try get some work.
-To fit into the primary demanding market of standard traditional domestic portraiture and rely on advertising and your work flow to ensure a constant supply or clients
-Make a niche market that none of a very small handful of photographers are currently doing. This will drastically reduce your competition but in return you will have a limited amount of clients who will have needs for your work. This form is how photographic trends originate and can ultimately have a mass demand in the long run after awareness has been made of your product/service.
Take Joel Grimes for example (www.joelgrimes.com) who uses composite photography to add drama to his portraits. This technique is nothing new but the concentration put into the photos leave the end result nothing but amazing. I will be posting more of his work in my next blog.
Elance is a site that works just like an online matchmaking site but for photographers and clients.
It's easy to make a free account where you can setup all of your online folios, hourly rate, contact details and the best part of it is, you even get emailed a list of 4-6 jobs each day that Elance has matched with your work description.
Many larger clients in the commercial realm are using this form of communication between not only photographers but any type of designer as it's easy for both parties to virtually meet and discuss the work to take place. Elance will charge the client on average an extra 10% your specified hourly rate/total cost. for example if you're working for $100 an hour, Elance will bill the client for a $110 hourly rate which is more than fine will a majority of designers out there. If the client won't pay you for your work then Elance will give you your hard earned cash after a specified period and they will deal with getting debt from the client.
Elance is a new customer to provider platform enabling easy and efficient communication throughout the world.
Have you got an Elance Account?
Wednesday, May 8, 2013
Kate Moss - Versace Spring/Summer 2013 Campaign
I was recently browsing through some Images
for a little bit of inspiration when I came across Kate Moss’ photo shoot for
Versace’s 2013 Spring/Summer campaign shot by Mert & Marcus, at first
glance I was really unsure as to whether or not I liked these images, and sat
and stared at them trying to force myself to decide.
It wasn’t until I came back a good twenty
minutes later for a second glance that I realized what was throwing me off, it
was her skin! What the daily mail described as “tanned
but incandescent” just looked sweaty to me.
Another thing, which seemed to cement
my opinion were the men! Fair enough some women may find this appealing but
they just made me cringe! For example
the below image, The first thing my eyes were drawn to was the shininess (The
BLINDING shininess) of all their skin, the second thing I noticed was the
men…and the way they were posed, and yes I had a right good giggle to myself.
Probably NOT the reaction Versace (Mert & Marcus) were hoping for with
these images.

As I continued to scroll through, my
reaction was pretty much the same, although I will admit that I do actually
quite like one image (Kate in the Aqua dress with Mr ‘Blue Steel’) and feel
that the lighting works quite well, it’s not distracting and the image just
seems to flow, but over all, I think the lighting just makes her look…well
gross…and sweaty.

The article, which I stumbled upon,
contained two more images featuring two other faces (Daria Werbowy and Joan
Smalls) of the Versace campaign. The same lighting technique had been used and
I felt that it worked MUCH better with these other two girls especially with
Joan Smalls who looks absolutely stunning. The ‘shine’ just appeared a lot more
natural and complimented the other girls well, whereas it didn’t seem to be
doing much of anything for Kate.

Follow the link below and have a look for
yourself.
Better Business Bible for Photographers
By ELLIOT TONKS on May 9th 2013

Found on the ACMP website the Better Business Bible really speaks for itself in delivering the best business practice for commercial photographers.
BBB content include topics such as image licensing, quoting & negotiating, terms & conditions, templates for estimates & licenses plus much more.
'The printed BBB is available free for full and emerging members of the ACMP and can also be purchased online here: http://acmp.com.au/better-business-bible/'
I've heard only positive comments on this bad boy and I will post a full review when I receive mine within the week.
Have you read the BBB?
Lens Whacking
Just the other day, I discovered the new trend of “lens whacking”. On reading the name, I was a bit startled. “Who in their right mind would WHACK their LENS on something?”. It just didn't seem right, so I looked further and found that it is in fact a reasonably simple way to create interesting depth of field in your images, as well as creative light leaks. It can also be used as a tilt shift alternative, as tilt shift lenses can be so expensive.
This is the video I watched to learn what lens whacking actually
is, and how to do it:
I am yet to try this cool trick out myself, but here are
some examples of the kind of images that can be created in this way:


As cool as this may look, there are some cons to go with the
pros, as there always are:
Pros:
- Reasonably easy to do
- Only requires a 50mm or smaller lens
- Can be used in the place of a tilt shift lens
- Creates interesting depth of field
- Can produce cool light leaks
- Allows you to be more creative with blur, in camera
Cons:
- Sensor is exposed
- Should have sensor cleaned after each lens whacking shoot ($$$)
- Risk of dropping either lens or camera body ($$$$)
- Would require a fair amount of practice to perfect
Although there are more pros than cons listed, if the more
damaging cons were to occur, you’d be looking at a lot of money for repairs, regardless
of saving on a tilt shift lens.
Overall, lens whacking looks like a cool and interesting
technique to spruce up your images, as risky as it may be. I will definitely be (carefully) trying it
myself!
Tuesday, May 7, 2013
15 ways to improve you live music photos
By ELLIOT TONKS on May 9th 2013

This post is about giving some tips and useful advice to our thriving base of young and aspiring live music photographers. Many will see this as a very niche area of work , though the amount of blooming photographers wanting to shoot the stage is on the rise. Our ever so growing base of artistic youth love their music and photography just to name a couple. They're incorporating both of these art forms to their life and work and essentially, killing two birds with one stone.
I've also included in this post a quick 'what's in the bag' photo and breakdown of all the gear which I use to get the work done.
What's in the bag?
As a live music photographer I often get asked what camera/lens setups I take and to worry about weight and do I even carry my bag during the whole show. Many photographers think it can be a bit over kill. Why? because I never know what's going to happen upon arrival.
The above image is what I take to a gig when a big named artist is playing because, I'm not going to be caught under equipped and unprepared.
-You're going to want a bag that you can fit in all your needed gear and make it all accessible
- At least one camera (Preferably full frame to handle low light situations well with high ISO). My other camera was used to take this photo. I use 2 Canon 5d MK II's
- A mono pod can be extremely helpful to get that steady shot when you're shooting at least 200m away from the action with a Tele lens. A monopod is preferred over a tripod because of space and setup time.
- Have a flash in your back pocket or even on the camera (If you want to make friends, don't let it fire during the show. The flash is vital for some quick backstage photos.
- Tamron Shoulder Bag
- 2x Canon 5d MK II's
- 70-200mm f/2.8 IS
- 50mm f/1.4
- 24-70mm f/2.8
- 17-40mm f/4
- Canon Teleconverter x2 MK III. This comes in extremely helpful when the photo pass permits me only to the sound desk
- Canon 580ex II Speedlite
- Manfrotto Monopod
- SPARE memory cards, camera and flash batteries.
- A pen, (sadly not every box office will have a pen for you to sign the contract).
15 tips
1 - Pack your bag long before the gig, check everything works and is full battery.
2 -You’ll probably want to set your ISO level to 800 or 1600 (for a cropped frame camera). At 1600 the images will be getting grainy with digital noise, but that’s sometimes unavoidable. If you’re in a venue with plenty of light set your ISO lower, you’ll get less noise
3 - Have everything at your side and know what pocket it is in
4 - If your camera allows you to change the type of light metering you should set it to spot mode. Always try and focus on the face or sometimes the hair of the artist is backlit and you can get a good focus on that (only use this technique when atleast 10m away from the subject as focusing on the hair while using a wide aperture will soften the sharpness of the face).
5 - You’ll want a lens that has a wide aperture, f2.8 or lower. There are 50mm f1.8 lenses that are quite good and cheap these days.
6 - In a low light situation you’re going to need to shoot at reasonably low shutterspeeds in order to get enough light in the camera. But remember the slower your shutterspeed the more likely your shots won’t be sharp, either because the subject moves or your hands move. (I try and keep above 1/200 at all times and 1/400 if I'm using the 70-200mm with the teleconverter.
7 - You can be technically adept but still take crap photos, the trick is knowing when to click the shutter. Watch the performance for a moment, where is the light on stage? You may have to wait for the performer to move into the light.
My favourite shots are ones that show emotion and energy. Go for a shot when the singer steps away from the mic, you don’t want it obscuring your shot. Try and get one when the singer is “in the moment”, reaching for a high note.
My favourite shots are ones that show emotion and energy. Go for a shot when the singer steps away from the mic, you don’t want it obscuring your shot. Try and get one when the singer is “in the moment”, reaching for a high note.
8 - After you’ve taken hundreds of shots at a show, cull them down to the best 20 or 30. Then cull that down to the best 3. If you’re going to show other people your photos don’t show them everything, just the very best. They’ll assume all your shots are that good.
9 -Be nice to those around you. Don’t shove your way to the front, if you want to get closer tap someone on the shoulder, smile and ask if they mind you moving forward to take some photos. If you need to stand right in front of someone ask them if they mind and promise you’ll only be there for a minute. Keep that promise and move on.
Don’t use flash, or if you have to, use it very sparingly. It’s distracting to others and will probably make your photos look crap anyway.
Don’t use flash, or if you have to, use it very sparingly. It’s distracting to others and will probably make your photos look crap anyway.
10 - I use one shot focusing for my work because I can get my focus and then reframe the image so 40% of the photo isn't black nothing-ness above the artists head. Sometimes the lighting can have a very eye pleasing effect through the settled smoke so that unwanted 40% could become a whole framed filled and colour saturated photo.
11 - Get creative and try and think of the readers perspective of where the photos will be displayed. If you didn't go to an event but want to read and see the review, would you just want to see a few headshot photos? No, you want to see the atmosphere of the event. The lighting, full stage shot, silhouettes, photos of the backdrop and the set. Capture everything that's there and what had effort put in to be there. Avoid getting up nose shots of the lead singer, get atleast 50 degrees side on.
12 - Try get as much experience at lower level events where it's even darker but you will probably be allowed to shoot for the whole set.
13 - Bring backups of your backups, ALWAYS BE PREPARED FOR THE WORSE. (Only two weeks ago I went to shoot a big named act only to find out my camera didn't work even though I was using it that same afternoon)
14 - The drummer is well lit 1% of the time, Work with it.
15 - ENJOY IT, Many times i've been able to stay for the free show, been given drink vouchers and even given extra passes for friends to come along for free. Don't see it as an office.
15 - ENJOY IT, Many times i've been able to stay for the free show, been given drink vouchers and even given extra passes for friends to come along for free. Don't see it as an office.
Conclusion
What other ways do you have to help you shoot live?
Subscribe to:
Comments (Atom)